Hi, welcome to TechWeirdo. In today's post, I am going to show you step-by-step how you can deploy a Cloudflare worker. How can you edit them, how to add routes and KV database etc? This basic guide is going to help you to use Cloudflare workers for various fun projects I will be showing you on this blog. So you can call this post a "how-to guide", designed to make you feel comfortable for all the upcoming posts about Cloudflare here. If you are not tech-savvy this guide is for you.
If you are new to Cloudflare you can read this beginner's guide to get started.
What are Cloudflare Workers?
Cloudflare worker is a serverless platform to run your code at 310+ edge locations of Cloudflare. Basically, you don't have any dedicated server to run your code, you deploy your code to Cloudflare and your code runs on the Cloudflare server across all of its data centers when triggered. If you really want to know more read about Serverless computing and Cloudflare Workers. Let's get into the real topic.
How to deploy a Cloudflare workers
Deploying a worker involves mostly two steps, deploying the code itself and creating a path to trigger the workers (like a URL which, when visited will run the worker's code) these two things are what you need to know to follow along the projects on this blog.
Step 1. Deploying the Worker script
Workers can run many types of languages, mainly JavaScript, Typescript, Rust, and most recently python. Now let's deploy it:
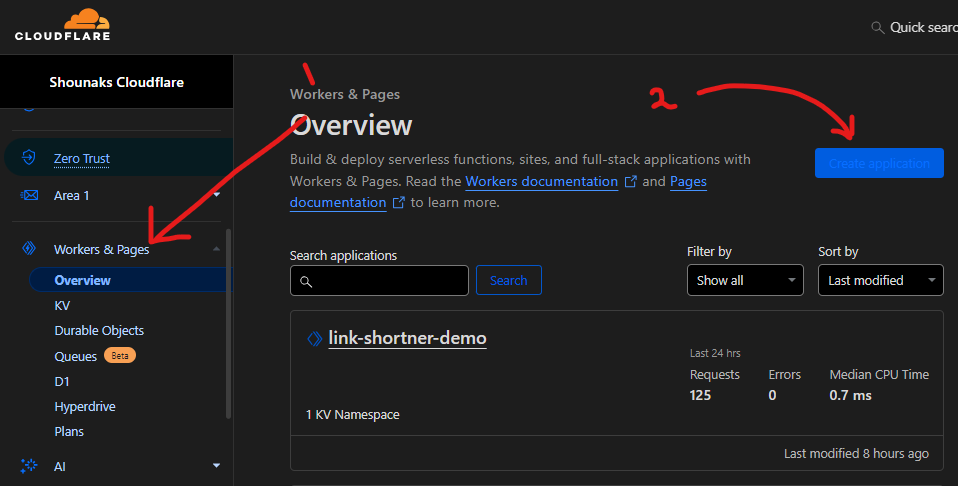
- Go to your Cloudflare dashboard and on the left sidebar menu click on Workers and Pages.
- Create Application
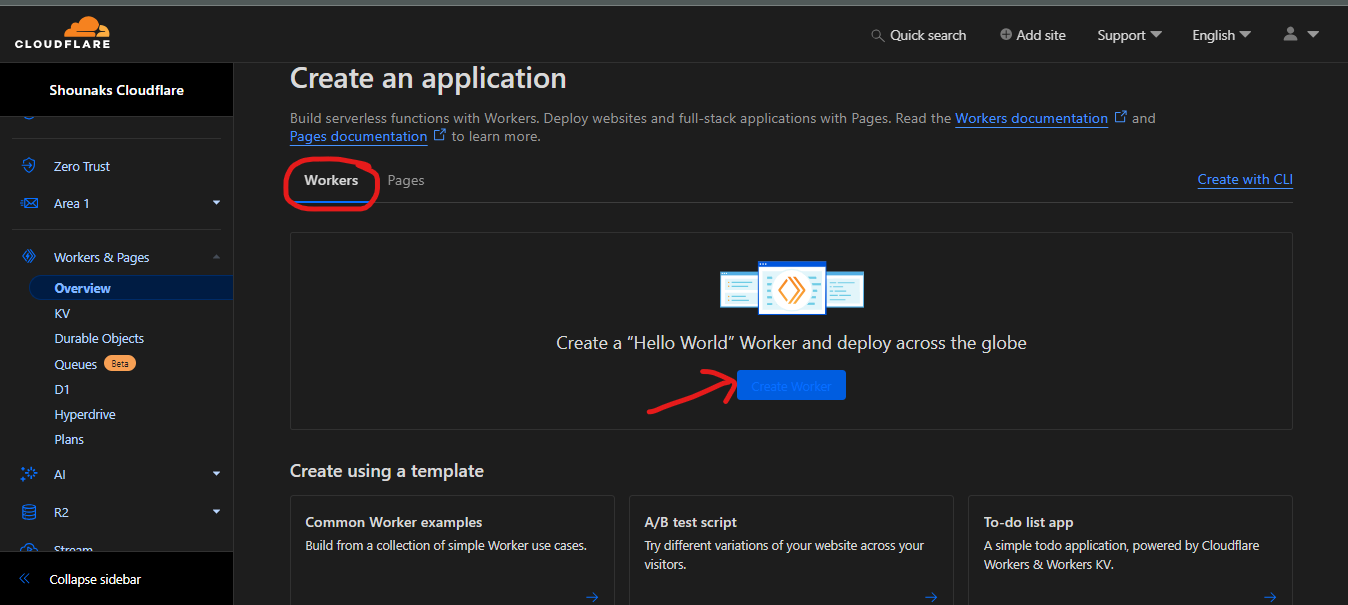
- Select Worker And Create Worker. You will also find interesting prebuilt worker scripts that you can deploy too.
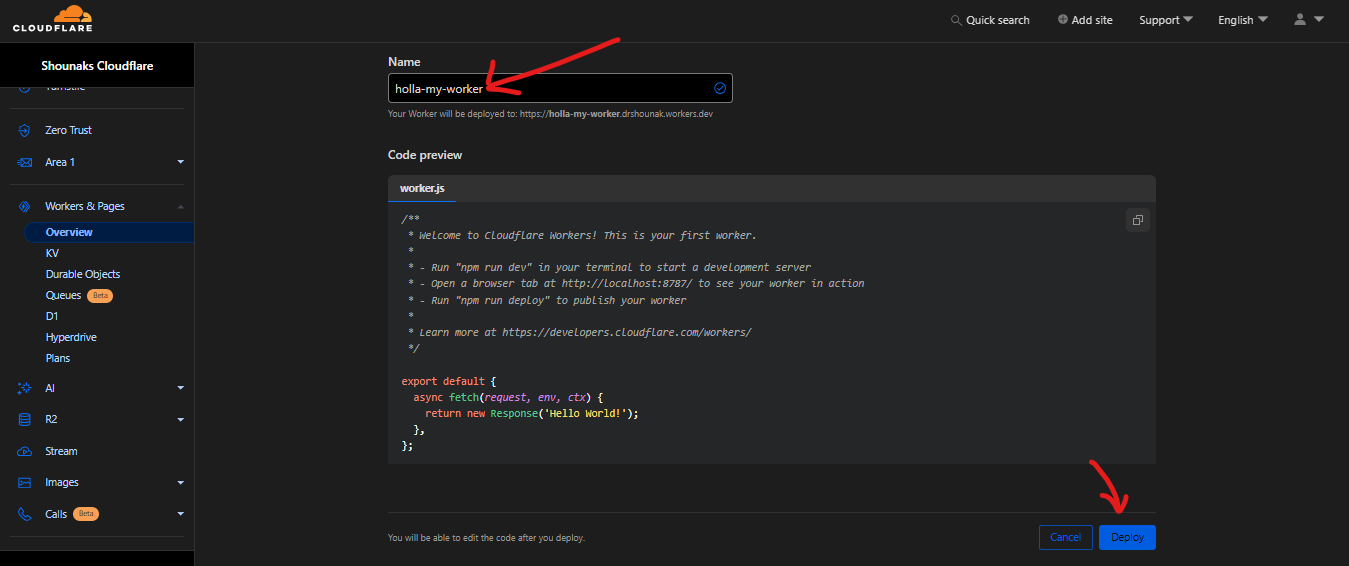
- Give Your worker a nice name so that you can understand later, and deploy. Note you can not edit the code right now. On the next page, you will find the edit code button. Go ahead and edit.
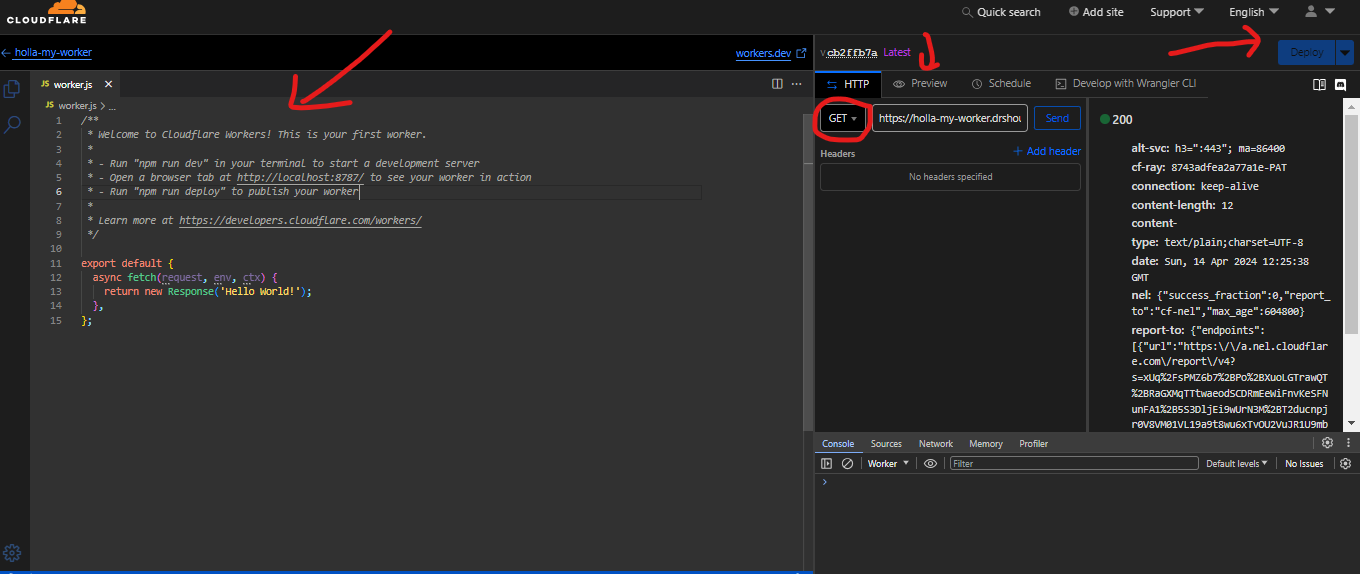
Now you have entered an area called Worker Playground. On the left-hand side you you can write your code. On the right-hand side, you have a preview option where you can test the user interface of your workers code. There is a http option, where you can send different GET/POST requests to check the function of your code. And when you are happy deploy the code on the right top region.

Now You have deployed your code on a worker and it is running globally. In the next step, we are going to add triggers, i.e. paths and URLs which will run the workers. We sometimes will also need to bind the database, environment variables, etc to the worker so let's do that.
Step 2: Add Routes to the Worker
On your worker dashboard now you will see you currently running worker. To manage the worker, select it, you will see a dashboard like this
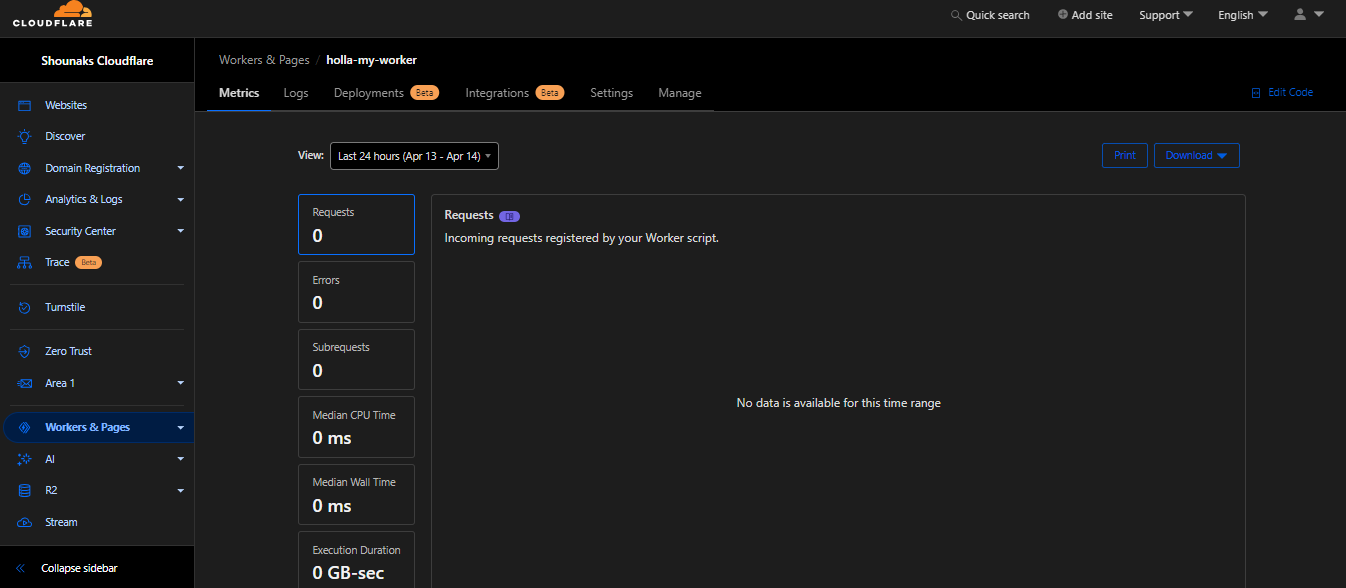
Go to the settings above, You will see three options.
- Trigger: At trigger, you will be able to add a custom domain to your worker. Or you can add a path to your worker. For example, if you have a website at
www.domain.comand you want to modify all incoming requests you the website, you can addwww.domain.com/*it as a path. So that all the requests will go through your worker. What trigger you will add will completely depend on your project. - Binding: Here you can bind different things like KV or R2 databases, Environment Variables, Worker AI, etc to your worker.
- At the dashboard, there is a "deployment" option, which is basically a lifesaver. Anytime you break something in production just roll back to the previous one and you are saved🙏🏻.
- To create a KV database go to the worker menu at the left sidebar. Select "KV", give a nice name, and select "Create namespace". Your KV database will be created.
That is all for today's tutorial. With this, you can deploy a basic Cloudflare workers script.
Conclusion
This tutorial was meant to be just a basic guide to get started with simple worker scripts. In reality, it was just the surface of Cloudflare workers and you can do more advanced stuff using their CLI tool wrangler. I am no expert in Wrangler though. But in this blog, I will publish different projects like serverless todo lists, PWA for Wix sites, contact forms, advanced edge caching, URL shortener, and many more with the help of Cloudflare Worker, and all those projects will need these steps. Anyways that is for today. If you found this helpful drop a comment below and sign up for email notifications. We will meet again, have a very nice day.